In The Classroom With Tony White: Traditional 2D Animation
In The Classroom With Tony White: Traditional 2D Animation
About the Class
"If you think something, you can draw it - and if you can draw something, you can animate it."
Origins: Throughout the winter of 2020 - 2021 instructor, Tony White, hosted
48 "live and online" classes on traditional 2D animation. This private course was broken down into 4 modules of 12 classes each. Namely.
- Traditional hand-drawn 2D animation,
- Digital (Moho) 2D animation,
- Animated film pre-production, and
- Animated film production.
Who should take this course?
The course was initially created for high school level students, for school credit, although older students from around the world virtually attended also.
Effectively, most students came in knowing absolutely nothing about animation but came out having made their own short, 30-seconds film. Existing animators learned many new things too, taking their work to the next level.
- Bonus material: In addition to learning the essential, core principles of movement, students on the course were also required to participate in an "observational gesture drawing" session, as a warm-up at the beginning of each class. This was to help them develop their "animator's eye" too. The course was so successful that the 2D Academy has now decided to release edited recordings of the classes as an on-demand learning experience for students unable to attend the classes at the time and at a price affordable to all.
- As indicated, the core content of this course is based around the core principles of movement that every animator should know - initially using traditional hand-drawn animation techniques, but in a separate course learning more through digital (Moho) techniques. This particular class is actually the first of 4 courses that will be released through the 2D academy in the near future.
- Training your "animator's eye": Each video on this and our future courses include also the "observational gesture drawing" exercises, as additional bonus material for students. The edited-out material from the original live course simply relates to the personal student mentoring that Tony offered individual students at the time, to protect their privacy.
- Drawing ability: It should be said quite clearly that although this particular course is based on hand-drawn animation techniques, students do not need to have strong drawing abilities to succeed with it. They simply have to love to draw! (As there's a lot of drawing to do in it.) Yet, high-level drawing skill is not at all essential to learning the principles of movement and the other aspects of high-level character animation that are covered in this course.
- Outcomes: By the end of the course, students will know and have demonstrated many essential principles of movement - including "dynamic key to key creation", "squash and stretch", "slowing-in and slowing-out", "inbetweening and superposition", "generic walks" and other important animation principles. Reference to digital 2D animation is made at the end of the course, in preparation for the release of our 2nd course in this series on "Digital (Moho) 2D animation", to be released soon.
Requirements
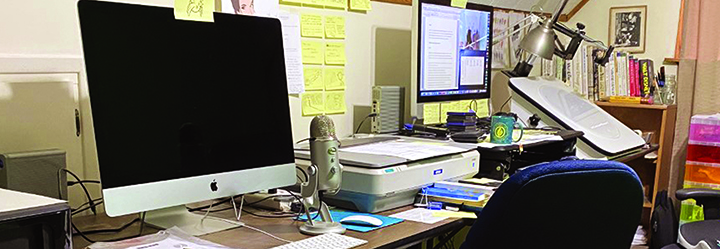
Tony's professional-level studio set-up - Although students do not need this level of equipment for this course.
Although students can in reality complete the assignments taught in this course using digital means - Such as students translating instructions and core principles onto an iPad or other tablet software that includes a digital pencil - the focus is on teaching here is primarily using traditions, pencil, and paper, 2D animation techniques. It is considered that this is the finest way to learn at the very beginning. The equipment required to do this includes.
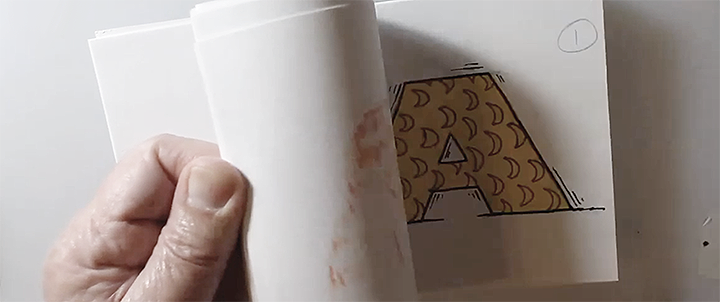
Flipbooks: Flipbooks are used in "Class 1" of this course. A flipbook is essentially a small, bound pad of blank drawing paper. However, a stack of blank, white drawing cards, bound together with a rubber band is probably the most convenient way of animating like this. Yellow "Post-it" notepads are another good solution.
Lightboxes: It is highly recommended - almost essential - for the student to have a backlit device that will allow them to see through their animation paper drawings. An inexpensive, A4-size, LED Illuminated tracing Lightbox option (widely available via Amazon for example) is perfectly fine for this.
Professional lightbox set-up (left) and a simple LED tracing box (right).
Pegbar: Essential for registration of animation drawings. "Acme" is a professional-level peg bar, although there are peg bars that match the standard 3-hole office punch system too.
The standard "office punch" peg bar (left) and "Acme" peg bar (right). Both are available from Lightfoot in the USA.
Animation Paper: For registration purposes, animation paper needs to be punched to match the peg bar system you are using.
The standard "office punch" peg bar (left) and "Acme" peg bar (right). Both are available from Lightfoot in the USA.
Pencil, erasers pencil sharpeners: Standard pencils, erasers, and manual pencil sharpeners will do. However, an electric pencil sharpener will save a lot of time when you do the large number of pencil drawings needed to make your animation.
Capture equipment: When finished, animation drawings need to be captured frame-by-frame and rendered to videotape for review. There's no one-stop-shop way of doing this, unfortunately, so students will need to be imaginative in how they do it. Below, there are a few ideas. (Note" Scanners, with peg bars attached, are an excellent solution, as long as scanned drawings can be converted to video using a film editing program afterward.)


